
Work the DSR queue.
Review, act on, and close the requests that need a human.
Open ai.trustsuperset.com/dsars/manage.
This is where every request lands that you haven't fully automated, plus anything that needs a human eye. Requests are collected automatically from your privacy inbox and your webform, so by the time a request reaches this page Superset has already classified it and pulled out the structured data.
The queue
Each row shows a request's Status, its Origin (Email or Webform), the requester's Email, the request Type, and when it was Received and Completed. Search the list from the box at the top, switch between list and detail layouts, and use the Showing Needs Review filter to narrow down to the requests that actually need you rather than the whole history.
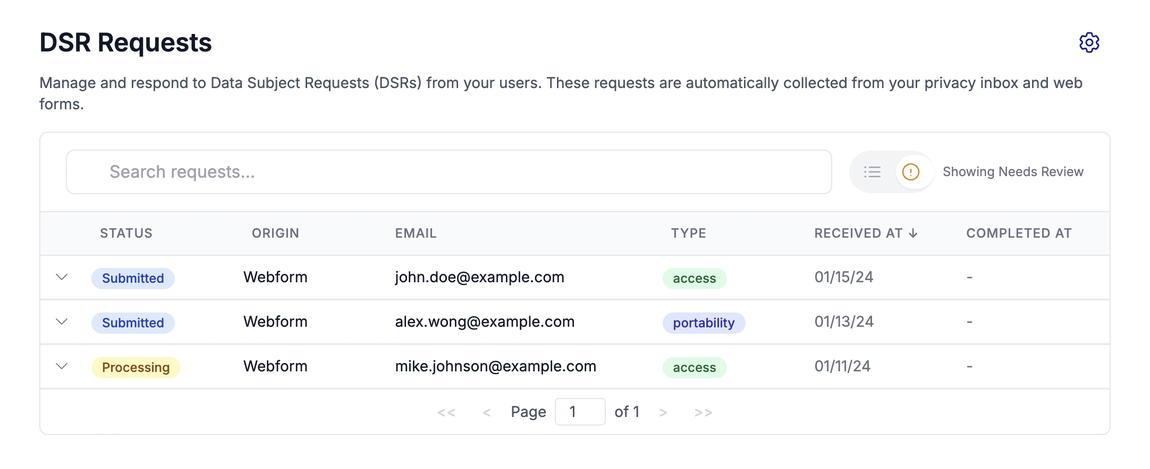
Filter and sort the DSR Manager
Beyond the Needs Review / All Requests toggle, the column headers double as filters and sorts, so you can slice the queue however you need:
- Filter by Status, Origin, or Type. Click the Status header to filter by state (Submitted, Processing, Unverified, Error, Completed), the Origin header to filter by where the request came from (Webform or Email), or the Type header to filter by right (Access, Erasure, Rectification, Restriction, Portability, Automated, Optout, Sensitive). Tick the values you want to keep in view and the rest drop out.
- Sort by Email, Received At, or Completed At. Click the Email, Received At, or Completed At header to sort by that column, and click again to reverse the order.
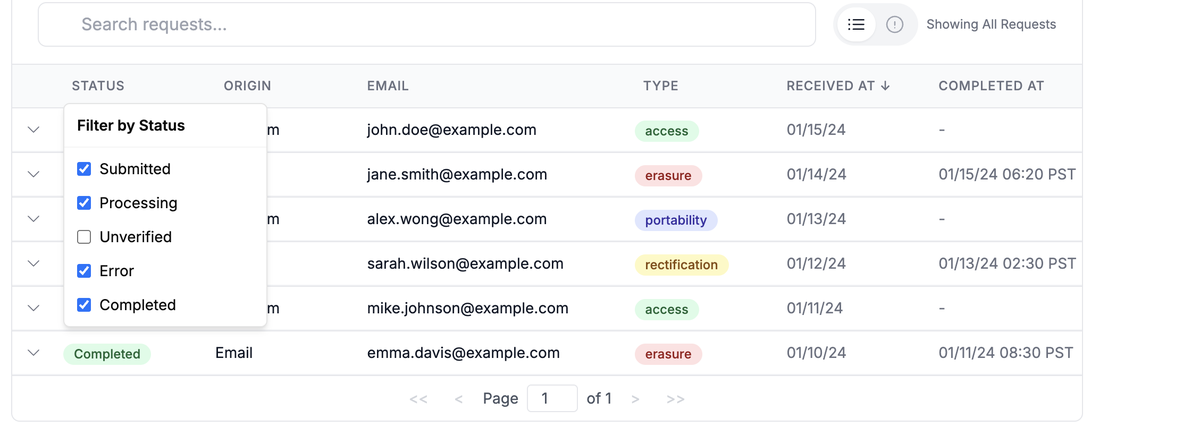
What the Unverified status means
A request sits in Unverified when Superset has sent the data subject a verification link they haven't clicked yet. You'll see it most on portability requests: when the sender's email doesn't match the data subject's email, we don't hand over consumer data to a third party without consent from the data subject, so we email the data subject a link to confirm they meant to submit the request.
Until they confirm, the request pends indefinitely. That's by design, it's how we prevent a data leak, and no action is needed on your side. If the data subject confirms, the request flows on like any other.
Open a request
Click any row to expand it. You'll see two blocks of detail and the actions you can take:
- Metadata The request's own record: Origin, Sender's Email, Received At, Request Type, Completed At, Applicable Law, Authorized Agent Name (when it came through an agent), and Processed At.
- Subject's Data The identity and address fields Superset extracted for the data subject: name, email and business email, phone, the address fields, date of birth, mobile advertising IDs, and LinkedIn, along with a Confidence rating on the extraction. Alongside each primary value, the plural email, phone, and address rows show the complete list Superset holds for the request, with the primary first. These are the same fields you can reference as variables in an automation.

Act on a request
Two buttons sit on each expanded request:
- Mark Completed. Close the request by hand once you've actioned it on your side. Superset stamps the Completed At time and the request drops out of your "needs review" view.
- Execute. Run the automation you configured for this right (the API call and confirmation email from Step 3) for this one request, right now. It's the manual trigger for the same flow automation runs on its own, which is handy for one-offs and for requests you wanted to eyeball before letting Superset finish them.
For the bigger picture of what's flowing through the queue over time, head to your Dashboard.