Deploy your DSR form.
Your public-facing intake. Start here.
Open ai.trustsuperset.com/dsars/form.
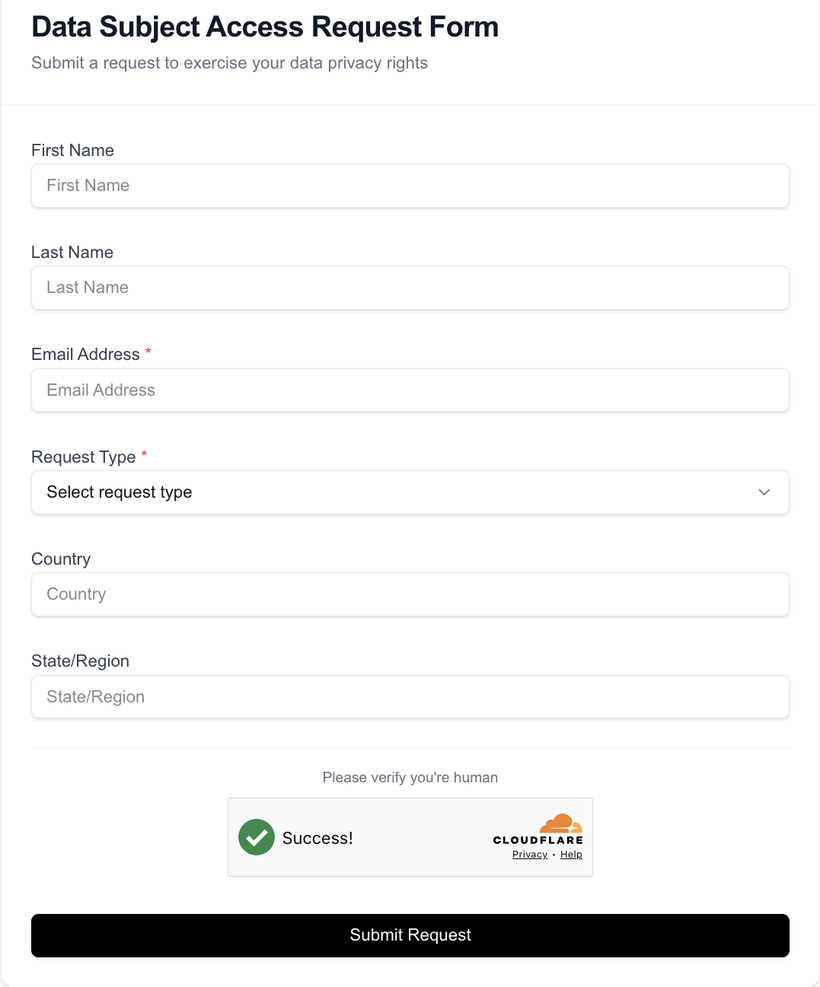
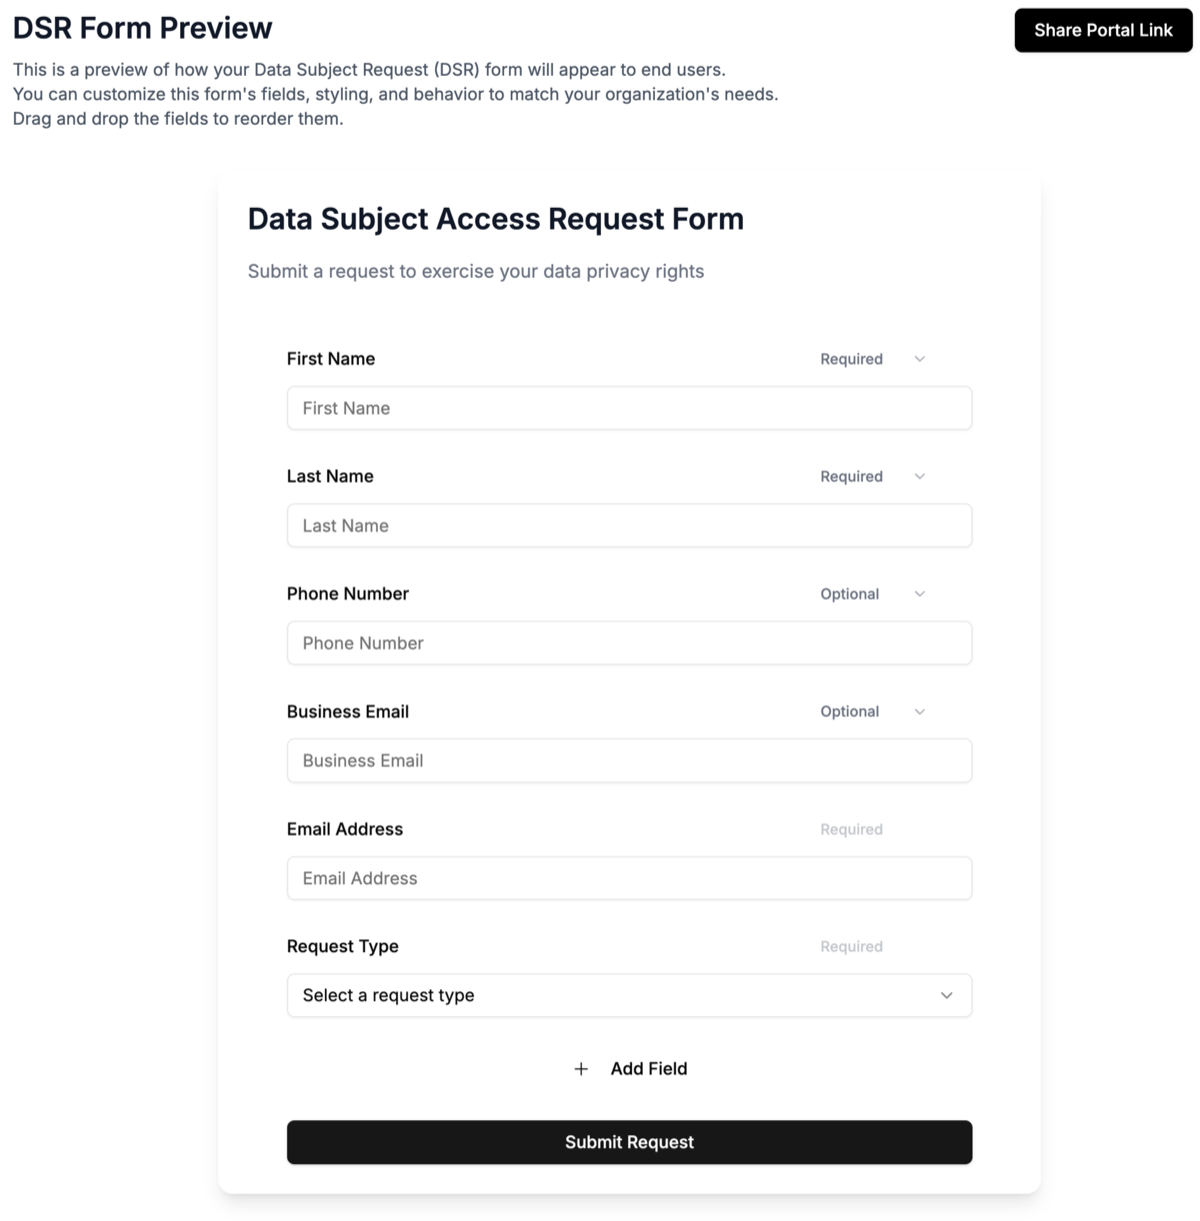
You're looking at a live preview of the consumer-facing DSR form. Your customers click a link, fill out this form, and submit a verified request. Submissions get classified and routed into your queue in DSR Manager, with identity verification built into the form itself. The form is also where Superset learns what data you need to find a data subject in your records, which the privacy inbox builds on in Step 2.
Why a webform submission counts as verified
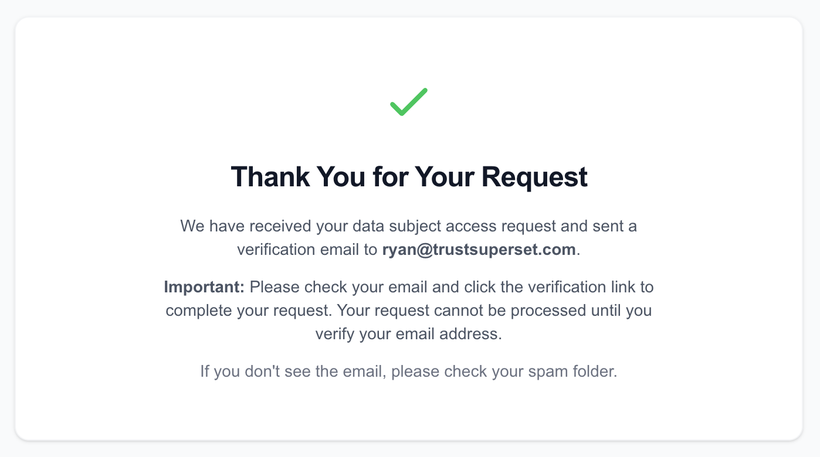
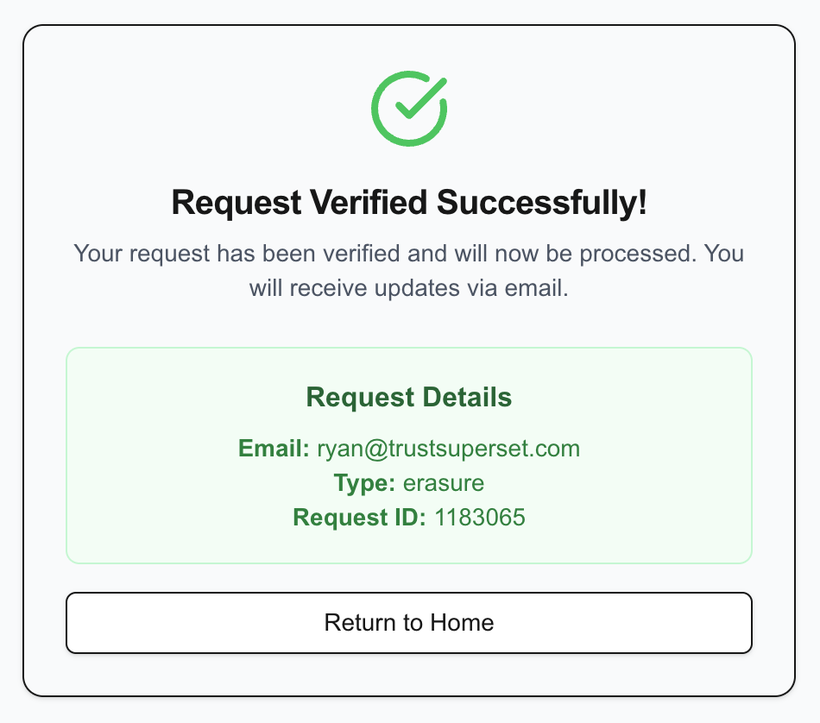
The form has two layers of protection against junk submissions: Cloudflare Turnstile keeps bots out, and every submission triggers an email verification link the data subject has to click to confirm they intended to file. That's what makes a webform submission a verified request, and it's why you can trust these on their face. The full requester experience is at the end of this page.
The fields on the form
Every field the form can collect comes from a fixed menu: name fields (First Name, Middle Name, Last Name), contact fields (Email Address, Business Email, Phone Number), address fields (Address 1, Address 2, City, State, State/Region, Zip Code, Country), other identifiers your data may key on (Date Of Birth, LinkedIn Address, MAID), and Individual or Authorized Agent to capture who's filing. Whatever isn't already on your form is available under Add Field at the bottom.
Customize it before you share the link
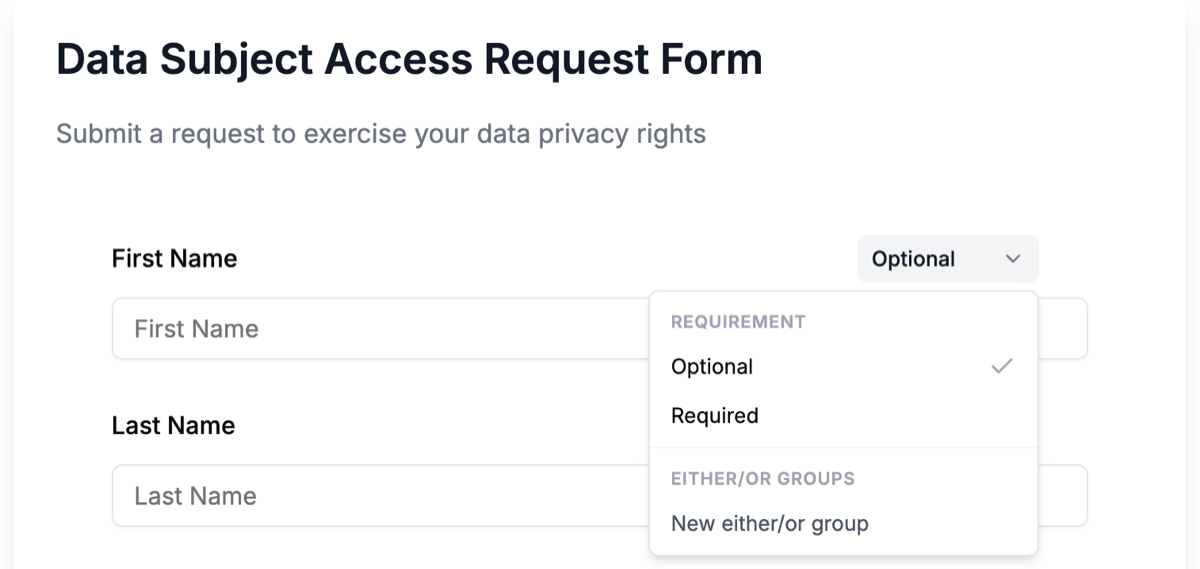
Each field has a requirement dropdown on its right with three settings: Optional, Required, or part of an either/or group (next section). Drag a field by the handle on its left to reorder.
- Trim the fields you don't need. Every required field is a friction point for legitimate consumers and a verification hook against bad-faith requests. Keep what you need to identify a data subject in your records, mark it Required, and drop the rest.
- Only require what's truly required. Anything useful-but-not-essential stays Optional, so a consumer who has it can give it to you without blocking the one who doesn't.
You can also edit the form title and subtitle at the top so the page reads in your brand's voice.
Require one of several fields with either/or groups
Sometimes any one of several identifiers is enough to find someone in your records, and you don't want to demand all of them. That's what either/or groups are for: open a field's requirement dropdown, pick New either/or group, and add the alternative field to the same group. Requesters have to fill in at least one field from the group to submit.
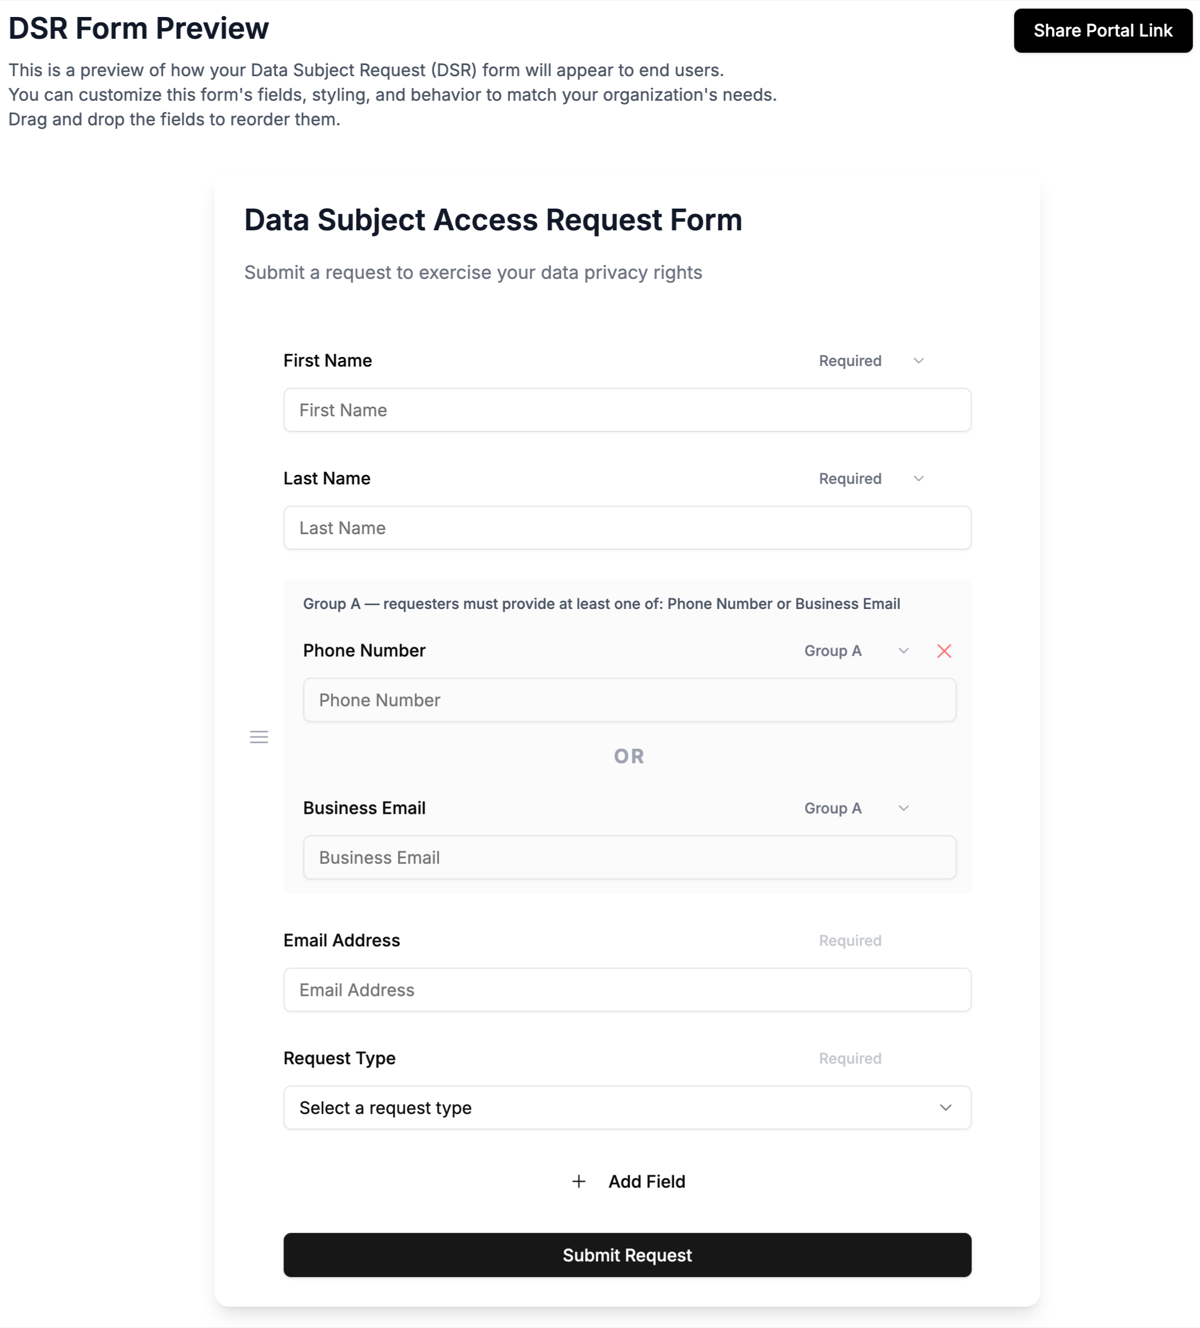
Groups compose with your required fields, so you can express a rule like name, plus a phone number or a business email: mark First Name and Last Name as Required, then put Phone Number and Business Email in one either/or group. On the public form the group renders as a single box with an OR divider and a line telling requesters to provide at least one.
Supported request types
The Request Type dropdown gives data subjects eight options, mapped to the rights in CCPA/CPRA, GDPR, and the broader U.S. state landscape:
Share the link
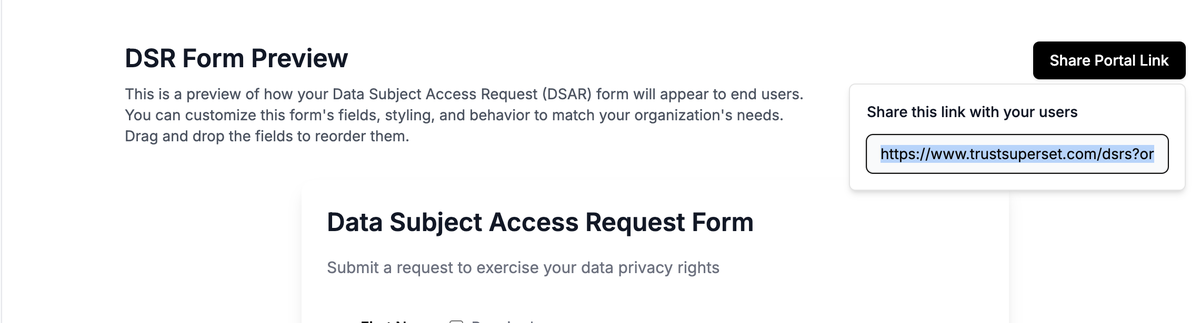
When the form looks right, click Share Portal Link at the top of the page to get the URL. Drop that link into your site's privacy page, the footer of your marketing emails, and anywhere else a consumer might go looking for a privacy request.
What the data subject sees
For reference, here's the full flow a consumer goes through after they open your portal link: